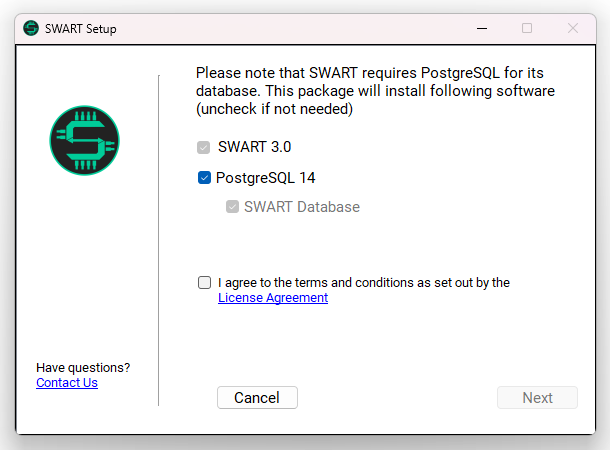
SWART installation process requires having swart_main_setup.exe. To start the installation process, please run swart_main_setup.exe. The following window will pop up
SWART installation requires PostgreSQL database management system. Whether you already have PostgreSQL installed or not, or you are just using SWART installation, choose one of the following guides:
- SWART & PostgreSQL Setup
- SWART setup with existing PostgreSQL
- SWART setup without PostgreSQL
SWART & PostgreSQL setup
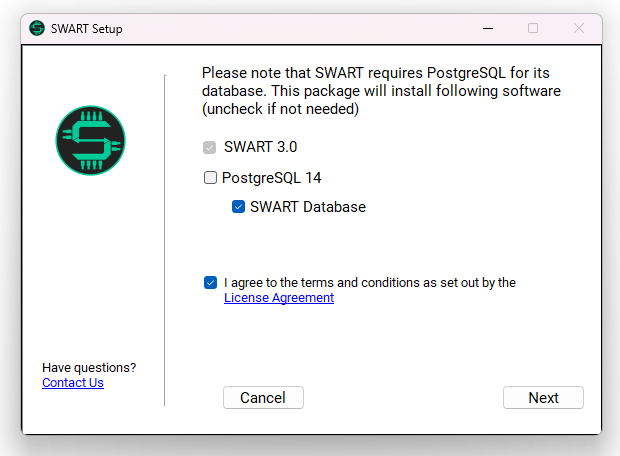
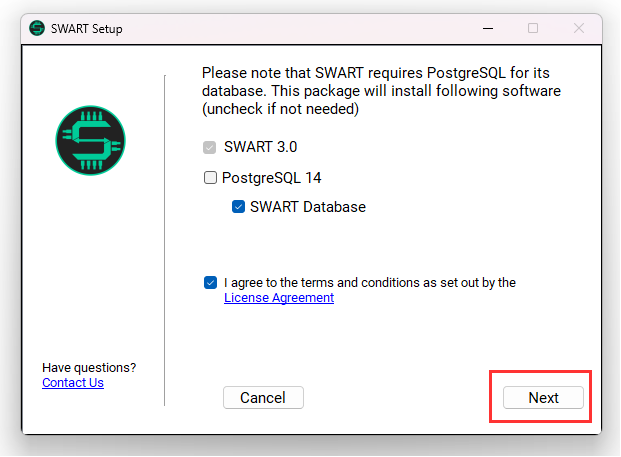
In case you wish to install both SWART and PostgreSQL with setting up the database for SWART, all you have to do is check the box for License Agreement
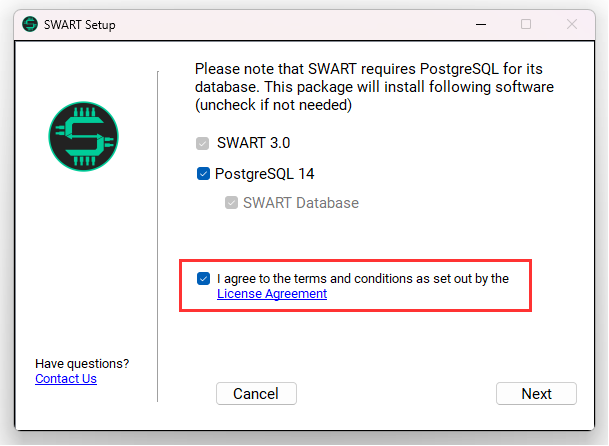
After which will the Next button become enabled, so you can proceed by clicking on it

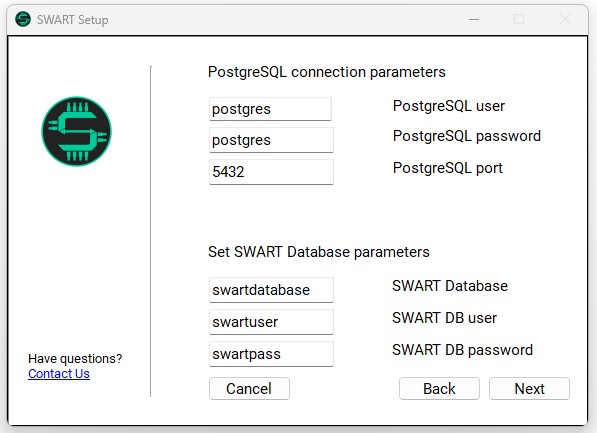
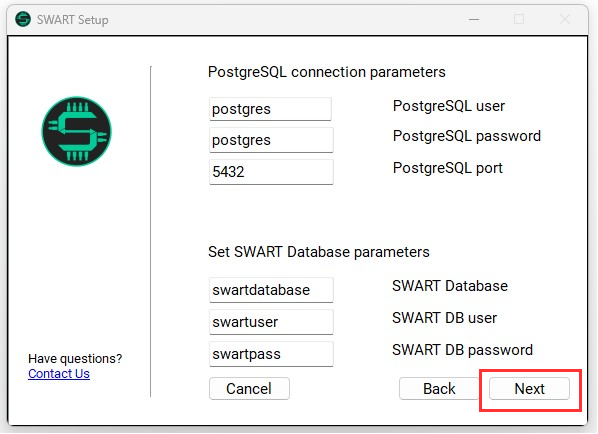
The following form will appear
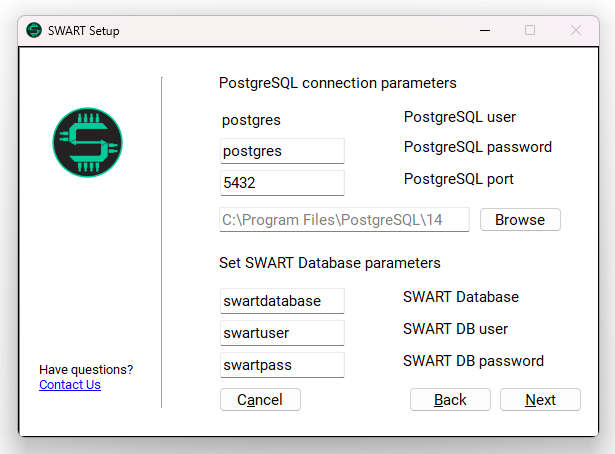
with listed PostgreSQL connection parameters and SWART Database parameters with recommended default values.
PostgreSQL connection parameters
- PostgreSQL user – postgres
- PostgreSQL password – postgres
- PostgreSQL port – 5432
- PostgreSQL installation location – C:\Program Files\PostgreSQL\14
To change default installation location for PostgreSQL go to Browse button next to it

to open File Explorer and choose the directory.
SWART Database parameters
- SWART Database – swartdatabase
- SWART DB user – swartuser
- SWART DB password – swartpass
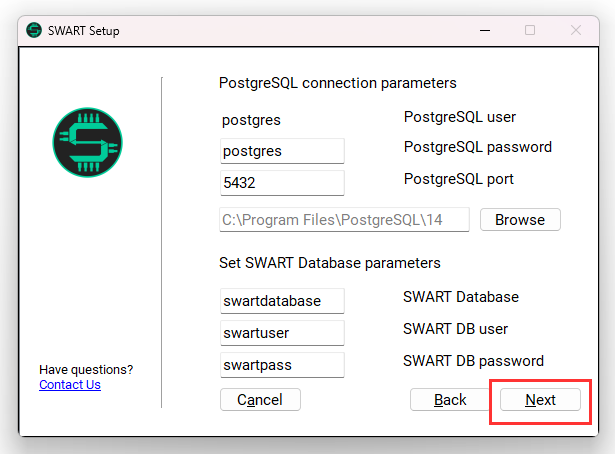
These parameters describe the name of the database that will be created and user and password for it. If needed, change the default values and go to the Next button
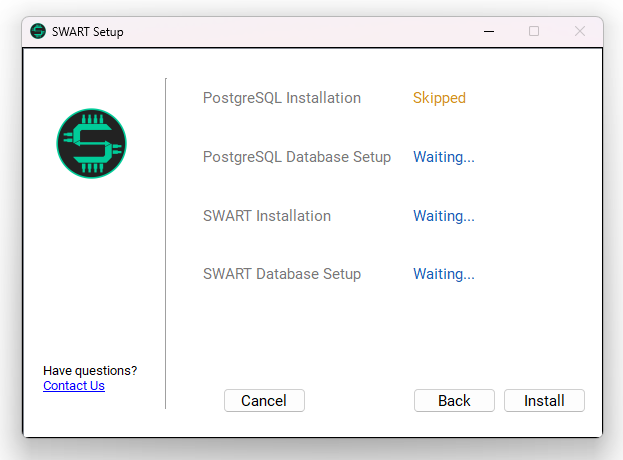
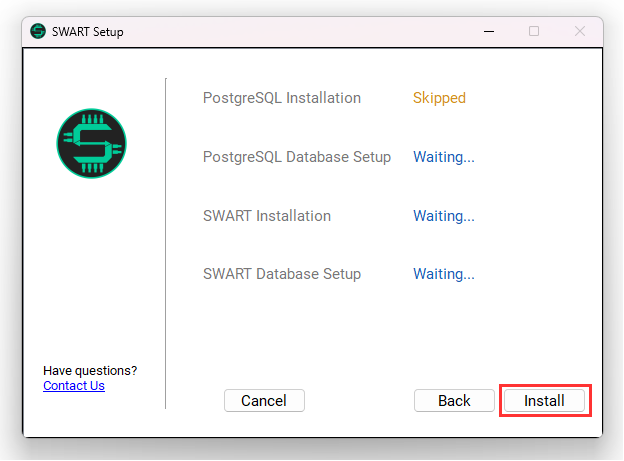
After which will the next form appear with the following statuses
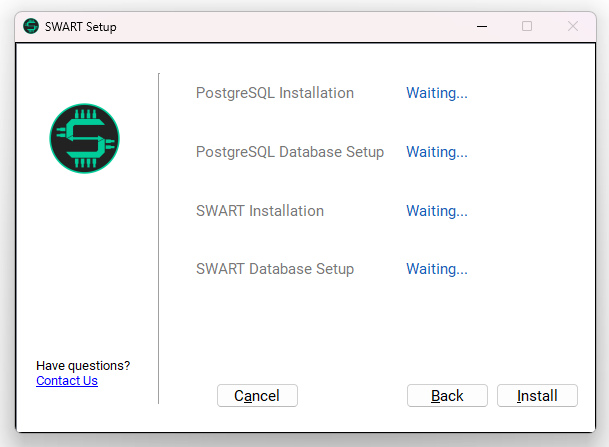
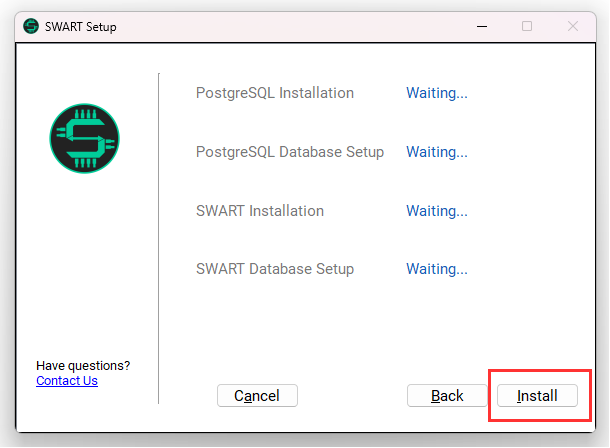
To start the installation process click Install button
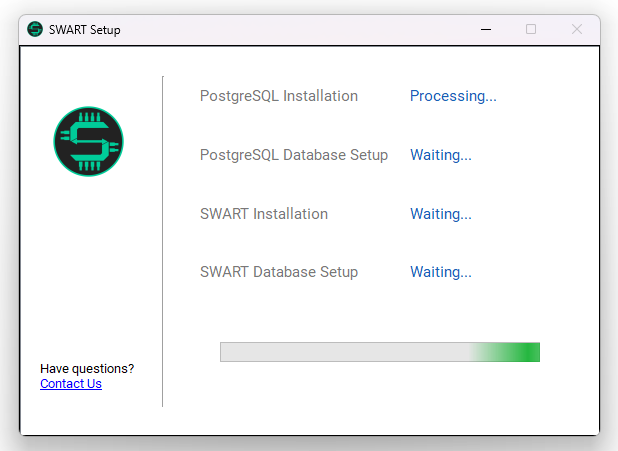
The installation of each process will go in the same order, so the first status will go from Waiting… to Processing…
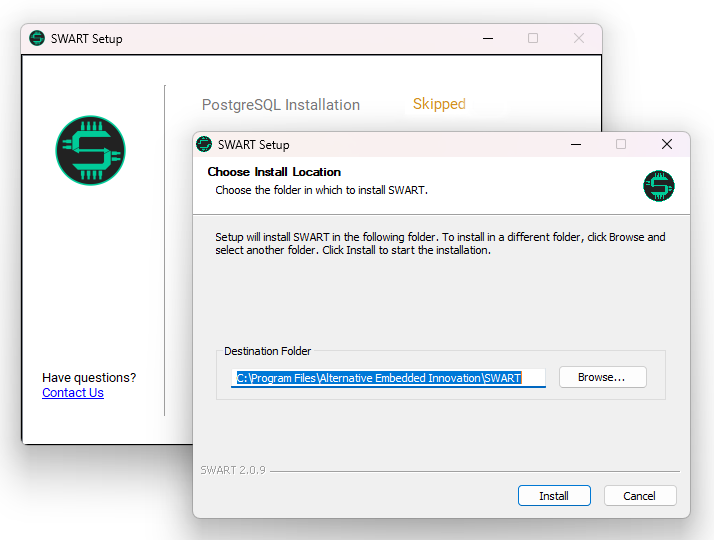
After PostgreSQL installation is done, SWART Installation Setup will pop up
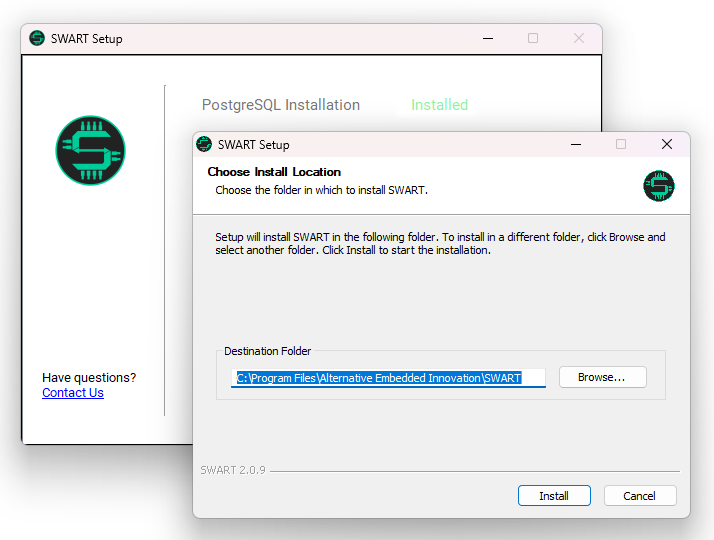
to start the SWART Installation, go to Install button and after that Finish button.
After all needed software is installed, you will get the following statuses
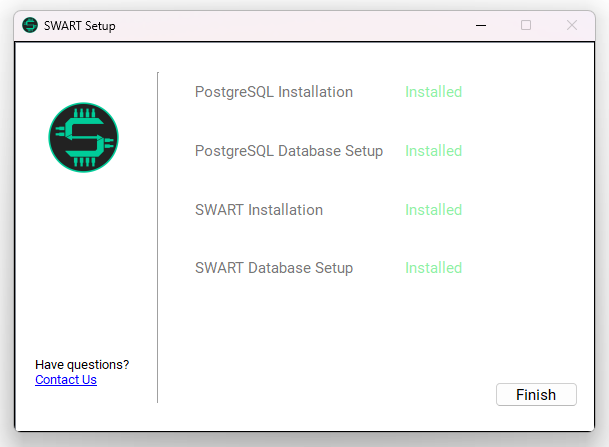
After which you can close the setup wizard on Finish button.
SWART setup with existing PostgreSQL
In case you wish to install SWART and to use it with database, but you already have installed PostgreSQL before, uncheck PostgreSQL but leave SWART Database checkbox checked, and check the box for License Agreement
and go to Next button
The following form will appear
with listed PostgreSQL connection parameters and SWART Database parameters with recommended default values.
PostgreSQL connection parameters
- PostgreSQL user – postgres
- PostgreSQL password – postgres
- PostgreSQL port – 5432
If you are using different parameters, change the default ones so that the setup can create SWART database using them.
SWART Database parameters
- SWART Database – swartdatabase
- SWART DB user – swartuser
- SWART DB password – swartpass
These parameters describe the name of the database that will be created and user and password for it. If needed, change the default values and go to the Next button
After which will the next form appear with the following statuses
To start the installation process click Install button
After PostgreSQL Database Setup is done, SWART Installation Setup will pop up
to start the SWART Installation, go to Install button and after that Finish button.
After all needed software is installed, you will get the following statuses

After which you can close the setup wizard on Finish button.
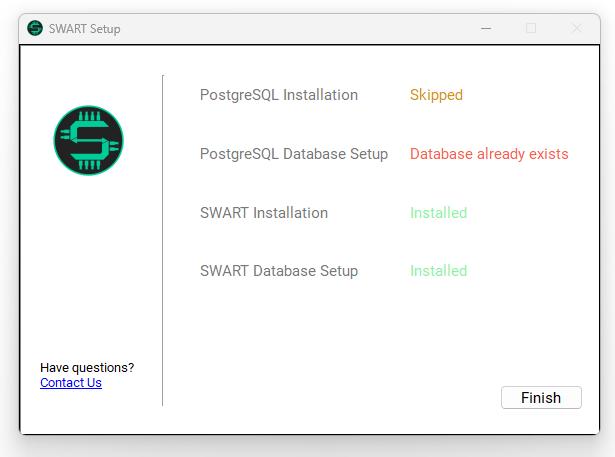
Note: In case you already have database in your system, the setup will not install it and you would get the following statuses
SWART setup without PostgreSQL
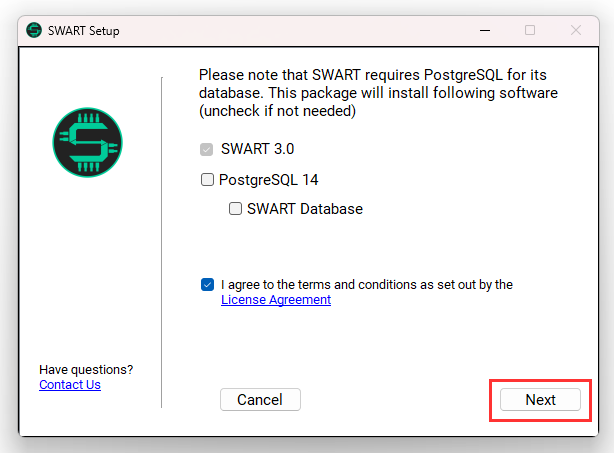
In case you wish to install only SWART without database, please uncheck PostgreSQL and SWART Database, and check the box for License Agreement
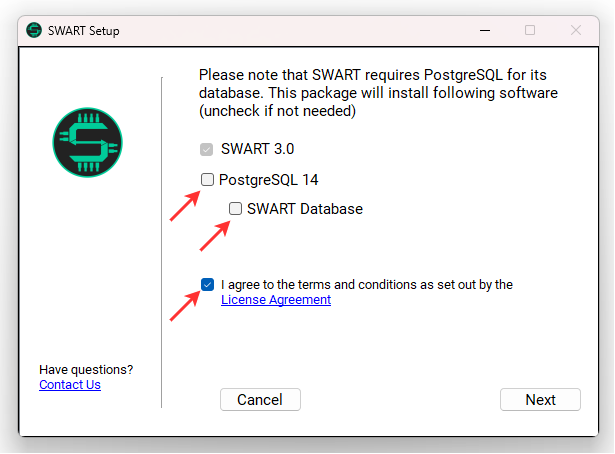
After which will the Next button become enabled, so you can proceed by clicking on it
The following form will appear
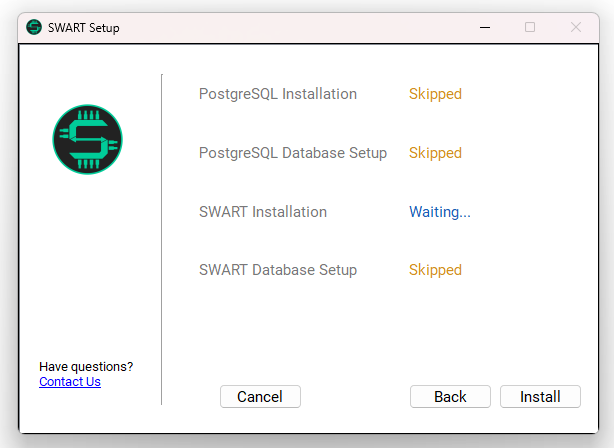
To start the installation process click Install button
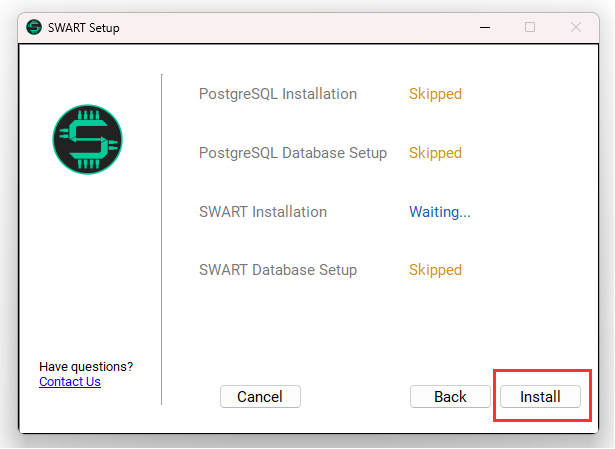
After which will SWART Installation Setup pop up

to start the SWART Installation, go to Install button and after that Finish button.
When SWART is installed, you will get the following statuses
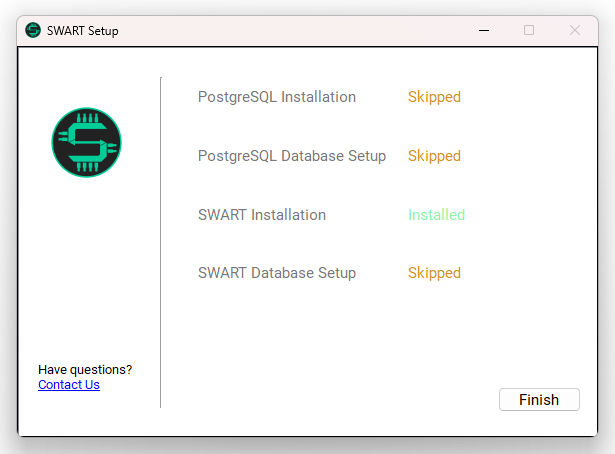
After which you can close the setup wizard on Finish button.
If you still have any questions, click on the link Contact Us at the bottom left.